For those of us who used to drag the timeline zoom slider so far in iMovieHD that you could see electrons orbit in your video clips, cutting video in iMovie '09 feels something like making an incision with a cannon ball. Making precision edits in iMovie '09 requires a little understanding of video formats and a much better understanding of the new UI. Want to trade in your cannon ball for a scalpel? Here's how.
A little info about video
Most of the video you will work with in iMovie '09 is probably in a format called NTSC and contains the equivalent of 29.97 frames per second. If it doesn't have 29.97 frames per second, then it probably will have less. PAL, for europeans, has 25 frames per second. Videos from your still camera might have as few as 15 frames per second. The reason I bring up framerates is that, as I understand it, the vast, vast majority of editing situations are satisfied as long as you can select each individual frame. There is nothing in between frames to edit, really, so cutting video with precision is a matter of cutting it at the right frame.
Enter the slider
The Project Slider

The Event Browser Slider

And this brings us to the new iMovie zoom slider. The slider actually shows up in two places: first, in your project window; and second, in your event browser. This is an improvement over iMovieHD because the only way to zoom in on video there was to add it to your timeline first. The Event Browser slider allows you to zoom and precisely edit a clip before you drag it to your project.
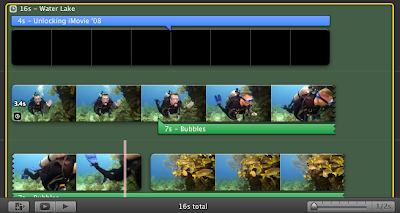
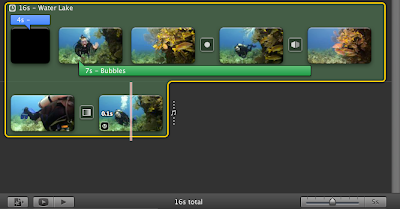
This new slider feels very different because the old zoom slider moved fluidly. That is, you could zoom in exactly as far as you wanted to. (At least enough to see only about 1.5 seconds of video in the timeline, depending on the size of your iMovie window.) The new slider has preset stops: 1/2 second, 1 sec, 2 secs, 5 secs, 10 secs, 30 secs, and "All". These stops refer to the amount of video that will be represented by a thumbnail. (And this is why iMovie '09 makes thumbnails of all of your video. It basically creates a really small version of a clip and uses that to represent your clip in the application window.) You'll notice that as you drag the slider around, you get more or fewer thumbnails. This is because you are telling iMovie how much video you want inside each thumbnail.
You can see this in action in the following shots:
1/2 Second
5 Seconds
All
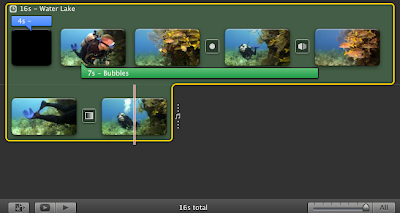
Notice how the Five Seconds shot and the All shot have the same number of thumbnails. This is because none of my clips are longer than five seconds. So no matter the zoom setting, individual clips will not be put together by the zoom slider. (Why the thumbnails look different between the two is beyond me.)
Yeah, yeah. How do I edit?
Taking what we know about the slider and what we know about framerates, all this means is that the most precise editing can be done when you select the 1/2 Second view on the slider. If your footage has thirty frames per second, you can put your understanding to the test. Set the zoom slider to 1/2 Second. Then, without clicking, slowly drag your mouse across a clip. (This is called scrubbing.) You will notice that the playhead (the red line) will jump as you slowly scrub. Each jump represents a frame. Within one thumbnail at the 1/2 second setting, you should be able to count about 15 jumps. If you set the slider to 1 second, you would be able to count about 30 jumps, or 25 in PAL videos.
The way you select video by dragging will work the same way. You can see this by clicking on a point in a clip and holding down your mouse button as you drag.
Dragging to select: Point A

Dragging to select: Point B

Point A and Point B are separated by a "jump" in the movement of the mouse, or one frame. If you zoom in to 1/2 second per thumbnail and you pay close attention as you drag, your edits can be just as precise as was possible in any previous version of iMovie.
Remember me? I'm the one who asked how I actually edit.
Once you have selected a range of video, what you do next depends on where you are. If you are adding video from the Event Browser to your project, just drag the selected clip and drop it in. If you are editing within your project, you can trim a clip down to the part you selected. Press Command-B or select "Trim to Selection" from the Edit menu.
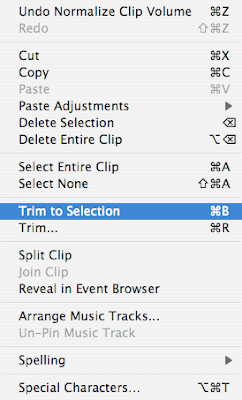
You can split a clip, by selecting "Split Clip" from the Edit menu.
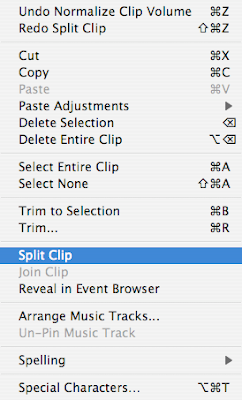
Spliting a slip will actually split a clip into three clips. One that comes before the range you selected, one made up of what you selected, and one coming after the range you selected. NOTE: You can no longer split a clip at the playhead, like in older versions of iMovie.
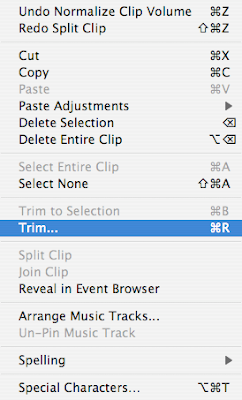
Another very interesting feature is the "Trim..." option in the edit menu. (This is replaced by the "Trim Music..." option that appears if you have a music track selected.) This will show the original video source in the project window and allow you to basically reselect the range you imported from the source clip. I consider this a very handy feature. You can bring it up by pressing Command-R or by selecting "Trim Clip..." in the Edit menu.
What about editing where an audio track comes in?
Editing audio is a whole other bag of chips. In some cases, editing audio works very similarly. What I call "sound bytes," which show up in your project as little green or purple flags sticking out under the video clips, exhibit the same frame-by-frame jumping as you drag your mouse to move or trim them. Not so if you are editing sound in the Trim Music window. In that window as you drag your mouse it is no longer jumping like before. This is because music is not broken into frames like video. Paying close attention to the preview window, you will see that the video is still jumping frame by frame, even though your mouse isn't. Back in the normal project view, if you are dragging a background music track to pin it to a particular point in the video, the dragging (for a reason I cannot discern) becomes much less precise, jumping many frames at a time. This one especially bothers me because sometimes you want a downbeat in the music to coincide with a specific frame in video. Hopefully, as you drag the music track you will be lucky enough to land on the correct frame. Perhaps someone can add a little insight in the comments below. Also, there will be more audio editing posts on the way.
I hope this has been useful. Although video selection and editing is pretty different than in older versions of iMovie, it is no less precise. So grab that scalpel and get cutting!


3 comments:
Is it just me or did Apple jump the shark a little bit with iMovie 09? Previous versions provide much more intuitive controls and this version seems very, just...unintuitive?
What do you think?
I just want to split an audio track (it's a recording) in two so I can move one half and not the other - maybe im being really think but I cannot do it! it is driving me insane.
I am so confused.....I need to upload video for a contest in 30 frames per second. I do NOT know or understand how to set it to that or how to find out what setting it actuallly is currently.
PLEASE HELP!!!!!!
dmgeorge3@gmail.com
Post a Comment