Showing posts with label Interface. Show all posts

Quick Tip: Mouse Wrapping

|

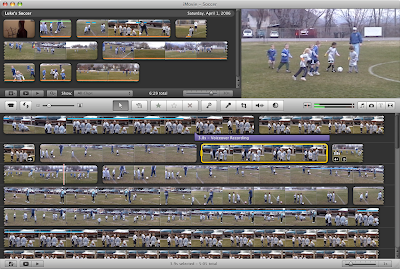
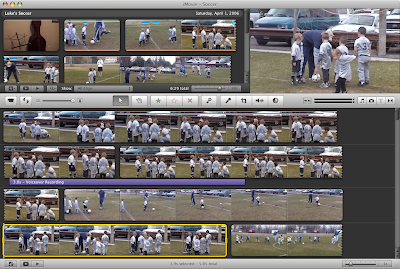
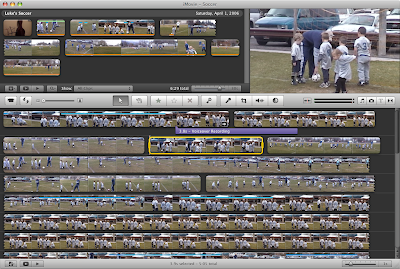
So traditional editing timelines scroll endlessly to the left or right. iMovie '09 breaks tradition by wrapping the timeline vertically when it gets to the end of the window, much like text wraps in documents. This really isn't the big deal some people make of it, but it does take some getting used to.

iMovie '09 gives ground to those still adjusting with this cool little trick: When dragging an element horizontally, iMovie will magically wrap your mouse cursor as though you were dragging in a traditional timeline. Think of it as having a mouse wormhole at the end of every line of clips.

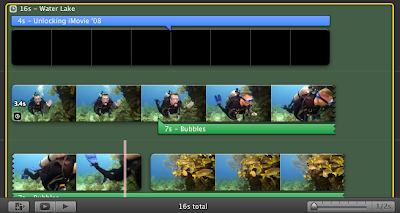
To test this, grab a title in one of your projects. Drag the title to the right, and when you get to the end of that row of clips, keep dragging to the right. Poof! You mouse cursor automatically moves to the beginning of the next line and you can just keep on dragging.

This seems to work when dragging the following elements:

  • A title, either the entire thing or just the ends of it;
  • A background audio track;
  • A sound clip, either the entire thing or just the ends of it; and
  • The yellow selection border of a clip that wraps to a new line. (This works in the Event Browser, too.)
You can still drag these items vertically, if you prefer.

This doesn't work when dragging to relocate:
  • A clip or part of a clip;
  • A transition;
  • An image; and
  • A travel map.
UPDATE: Someone else pointed out another really cool trick. Hold down the Shift-key, or turn on Caps Lock, and your mouse will always wrap to the next line.

Read More...

Quick Tip: Double Click

|

Apple has changed the effect of double-clicks with iMovie '09. In the previous version of iMovie, double-clicking would start previewing the clip from the point of the cursor. Now double-clicking will do all of the following:

1. If you double-click on the body of a clip, title, transition, map, or sound track, iMovie brings up the Inspector window.

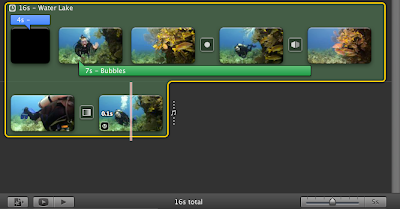
2. If you double-click between clips (and not on a transition) in a project, iMovie shows you the precision editor for that cut.

3. Also in a project, if you double-click on the time of a clip (the little numbers on the left side of the clip), iMovie gives you the Clip Trimmer window.

4. Double-clicking on a chapter or comment marker allows you to edit the text of the marker.


If you notice any other useful changes to iMovie mouse clicks, please share them with us in the comments!

Read More...

How to Use the Advanced Editing Tools

|

Editor's Note: This is an updated version of an article from my previous blog: Unlocking iMovie '08.

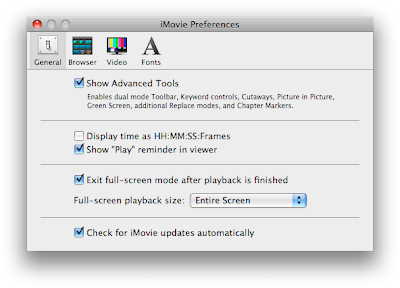
As you become more capable in iMovie, you may want to pay attention to this option at the top of the preferences window:
The better I get at iMovie, the more I have come to appreciate the value of the Advanced Editing tools. With just a little bit of practice, you can significantly speed up how you edit.

iMovie tells you (in tiny little type) that this checkbox enables, among other things, the dual mode toolbar, keyword controls, and direct trimming. We'll just go through each of these tools and show you how they work.

Preface: The Single Mode Toolbar
Before you ever enable the advanced editing tools, there is a lot the toolbar can already do. This is what the non-advanced toolbar looks like:
I will ignore the three buttons on the right for the purposes of this post. The four buttons on the left have different effects on the footage in your Event Browser.

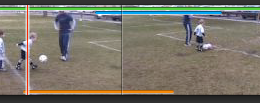
The first button, the edit button, is essentially an alternative to dragging clips into your project. If you select a range of footage in your Event Browser, clicking this button will add the footage to the end of your project. You can get the same result by pressing "E" on your keyboard. Once footage is in your project, the corresponding footage in the Event Browser will show an orange line running along the bottom.

The second button, the solid star, marks the selected footage in your Event Browser as a favorite. Fav-ed footage will have a green line running across the top. Hitting the "F" key will do the same as clicking the Favorite button. This editing tool is especially useful if you have a lot of footage to sort through, footage you may not want to use but don't want to delete entirely.
The fourth button (yes, I know I skipped the third one) with the big X is the Reject button. This is not for marking footage involving your deadbeat brother-in-law. Instead, this button is for getting rid of footage you never intend to use. (So maybe it is for your deadbeat brother-in-law.) The letter "R" or Delete key on your keyboard are alternatives to this button. Rejected footage has a red line running along the top. Rather than getting into the Reject button's further uses, I am going to refer you to another How To:

How to delete a video clip

The third button with the empty star (see, I knew what I was doing) is the Unmark button. If you have marked Event Browser footage as a Reject or a Favorite, this button clears that away. The letter "U" will also unmark footage.

These tools beat out anything that iMovie HD had to offer in terms of sorting footage. But their power isn't limited to making little lines across your footage. In the bottom left corner of the iMovie window, you will notice this:
That pull-down menu allows you to restrict the footage you see in your Event Browser. You can see only favorite footage. You can see favorite and unmarked footage, which is another way of saying that you don't want to see rejected footage. Or you can see only the rejected footage. You can also select these different options in the View menu. There is no way to see only footage that is in your project, presumably because you can already see that footage in your project, but I hope Apple adds this view in the future because I can think of situations where it would be useful, like making changes to all of a project's source footage for use in another project.

Ready for the final cool trick? If you have one long clip with only some of it marked, you can automatically select just the marked footage by clicking on the color bar in the clip. This makes selecting marked footage a piece of cake and was a nice touch by Apple.

All of your footage markings will stay in place no matter what project you are editing, with the obvious exception that footage marked with the orange line will differ from project to project. I think it would be very cool to have project-specific favorites, but I can see how this behavior could be confusing to a user who thinks favorite footage is always a favorite. Despite that minor complaint, all of these marking tools work pretty well. And so they should, when you consider that quick sorting and editing is the central design theme behind iMovie '09.

Part I: The Dual Mode Toolbar
So all of those marking tools are available without ever enabling the Advanced Editing Tools in the preferences. Enabling them turns the marking tools up a notch with "dual mode." The advanced editing toolbar looks like this:
You'll notice two additional buttons. The key button is for keywords and will be addressed below. The arrow button is just for enabling the normal selection behavior you have already become accustomed to. This button can also be enabled with the Escape key on your keyboard.

So what is dual mode? It is basically a way to mark and edit footage by simply dragging the mouse. Think of it as a set of footage highlighters. The orange highlighter will add the footage to your project. The green one will mark it as a favorite. The red one will reject it. You also have your highlight eraser to remove red and green marks. To test this out, make sure no footage is selected in the Event Browser and click the "Favorite" button. You still scrub like normal with your mouse, but if you hold down the mouse button as you scrub, the footage you drag over will be highlighted green. Let go of the mouse button and the green line remains along the top of that footage. The "Edit", "Unmark", and "Reject" buttons all work the same way. In fact, if you really want to maximize the editing speed of iMovie '08, using the "Edit" tool in dual mode is scary-fast. Welcome to the new iMovie.

As mentioned above, you can always return to the normal clip selection behavior by hitting the escape key or clicking the arrow button. The other marking tools will work like normal as long as the arrow button is selected. Dual mode does take a little practice, especially if you are still getting accustomed to scrubbing in iMovie '08. With a little practice, however, the dual mode toolbar is worth keeping enabled all the time.

Part II: Keywording
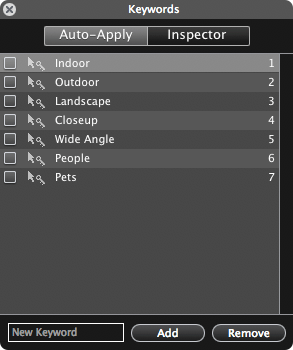
For you grammar buffs, "keywording" is a word now. After all, Apple has added "keywording controls" to iMovie '09. This takes your marking tools to a whole new level. If you click the key button in the advanced mode toolbar, you will get this floating window:

This is where you can mark up footage with specific words or phrases of your choosing. For example, say you wanted to identify all footage that contains an annoyingly exuberant soccer mom, you could add "soccer mom" to your list of keywords and mark all footage with her in it. It's footage you don't necessarily want to reject, but it certainly isn't your favorite. This is where keywords help.

Enough of the concept. How do these actually work? You'll notice in the aforementioned window that there is an "Auto-apply" tab and an "Inspector" tab. The "Auto-apply" tab works just like our highlighter versions of the other markup tools. You select the keywords you want to apply and click-drag to highlight the appropriate footage. If you want to add keywords to your list, you enter them into the text field at the bottom of the "Keywords" window.

The "Inspector" tab only works if you have already selected a stretch of footage. If you have some footage selected, it will show you what keywords have been applied to that footage and allow you to add more keywords by checking boxes or typing in the text field at the bottom of the "Keywords" window. Whether you added keywords with the "Auto-apply" tab or the "Inspector" tab, all footage with keywords applied will have a blue bar running across the top, but just under where the green favorites and red reject bars are found. This clip has a green, a blue, and an orange bar showing it is a favorite, has a keyword, and is used in my project.

Also notice that while you cannot mark clips in your project as favorites or rejects, you can mark project clips with keywords. Doing this will also mark the corresponding footage in the event browser with the same keywords. (Remember, iMovie '09 works by referencing source footage instead of making copies of it. This is why a keyword applied in your project will also be applied to the source footage.)

Now for the really useful part. Once you have applied keywords to various lengths of footage, you can tell iMovie to only show footage that has been marked with a specific keyword. You do this by clicking on the new magnifying glass button that showed up in the bottom left corner of your iMovie window when you enabled the advanced editing tools.
This button opens a pane in your Event Browser that lists all of the keywords in your selected footage and allows you to turn keyworded clips on and off with a red-light, green-light set of buttons. You'll notice that excessive shake footage is also automatically marked and can be turned off.
Two more cool little tricks before we finish discussing keywords. In the "Keywords" floating window, you may have noticed numbers next to each keyword. You can tag clips more quickly by just typing the numbers that correspond with the proper keyword. Even cooler, if you press the number Zero on your keyboard, it will clear all keywords from the selected footage. The other cool trick is that you can organize your keywords in whatever order you want by dragging the words inside the "Keywords" floating window. Notice that the number shortcuts will always be in order, no matter how you reorder your keywords.

Conclusion: When "advanced" really means "organized"

So many of the advanced editing tools are more about efficient and convenient organization than anything else. In the end, this is what makes iMovie '09 advanced: quick editing, powerful organization, and all of this at your fingertips.

Read More...

Reader Tip: Use Shift-Arrow to set start and end points

|

I've said it before and I'll say it again, I love the keyboard shortcuts in iMovie '09. Michael Avory sent me this tip on using Shift and the arrow keys to mark start and end points of a clip while you are editing. I love the trick because if I am being slow and methodical about selecting a particular range of footage, I don't have to keep holding my mouse button down as I drag. It also works great because it means you can select footage during playback, no dragging required.

Anyway, take a moment to try out Michael's great tip:

Here is a tip for setting IN/OUT points that might interest you:

Make sure clip is not selected (no yellow frame). Play/drag to IN-point (pause), hit shift + left arrow (IN is marked) Play/drag to OUT-point (pause), shift + left arrow and the clip is selected from IN to OUT. To select a portion of clip up to a specific point: play/drag to point, hit shift+left arrow, place cursor at start of clip, shift + left arrow and the clip is selected up to your first chosen point.

These are very useful for editing clips to the beat of a music track, etc.

Read More...

How to Use the Fine-Tuning Controls

|

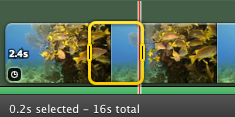
If you find that you want to add just a few frames to the beginning or end of your clip, Fine Tuning makes this quite a bit easier. In the bottom corners of a clip, there is a button with a line that has two arrows on either side. You can see the buttons I am talking about in the bottom corners of this clip.

When you click on either button, an orange border wraps around that end of the clip. This border comes with a draggable handle.

Go ahead and drag the handle. As you do, you will see iMovie counting the frames that you add or remove from your movie, together with the Viewer window showing the footage you are adding. Pretty dang handy.

One other tip: if you hold down Command-Option as you mouse around in your project, you will see the Fine Tuning option pop up without the need to click the little buttons.

Read More...

Quick Tip: Cut or Add Frames with a Keystroke

|

This is a great feature in iMovie '09. You can quickly cut or add frames to a clip in your project by doing the following:

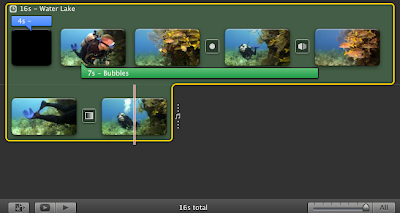
1. Hover your mouse cursor over the clip you want to edit. (If you hover near the beginning of your clip, you will be cutting or adding to the beginning. If you hover near the end of your clip, you will be editing the end.)

2. Use the right or left arrow keys while holding down the Option key.

If you are adding frames, you will see it working as the clip grows beyond the yellow selection outline. If you are cutting frames, the yellow outline will still cover the entire clip.

Read More...

Quick Tip: Full Screen Scrubbing

|

The full screen preview in iMovie '09 is excellent. Here are a few quick tips on drawing out all of its power.

You can enter full screen mode either by selecting the "Play Full Screen" from the View menu, or by clicking the full screen button below your project or event footage.

The button you want is the darkened rectangle with the arrow inside it. There are two of these, one under your project and the other under your Event Browser.

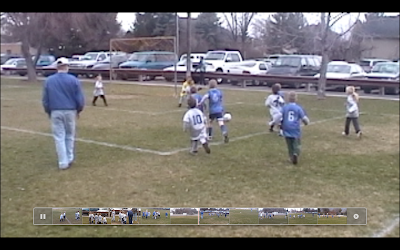
Once you are in full screen mode, you will immediately notice that if you move your mouse around, a clip navigation shows up across the bottom of the screen.
(Click to enlarge.)

This navigation bar will ignore your mouse movements until you click on it. Once you have clicked on it, dragging your mouse across the bar will scrub just like it does when in the normal iMovie window.

If you have scrubbed to a given point in full screen mode, and want to begin normal playback from that point, just hit the space bar. (Clicking a second time on the navigation bar does not disable the scrubbing ability.) Alternatively, you can move your mouse cursor straight up so it no longer runs across the clips in the navigation bar, then move your cursor over to click the play button.

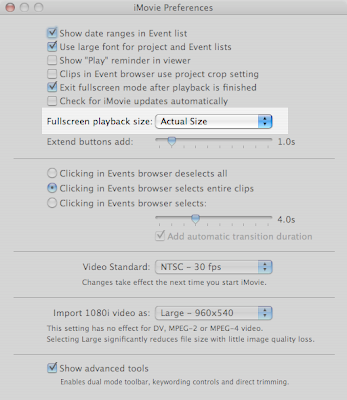
One other really nice feature is being able to restrict full screen playback to the correct resolution of your footage. Because most of us are editing footage that is lower resolution than our computer displays, a full screen preview will make your footage look worse because it upscales it to fill the screen. If you want to see what your footage looks like in its natural dimensions, go into the iMovie preferences and select "Actual Size" from the drop-down menu selecting full screen playback size.

Now your footage will display at its actual quality.

The more I delve into iMovie '09, the more hidden gems I find. If you have found any hidden gems, please send them my way or share them in the comments.

Read More...

How to Customize Your Interface

|

Getting used to the new iMovie interface was a challenge for me. I have spent enough time in the new version of iMovie to feel very comfortable. But it wasn't always that way. This is what I said on the old blog:

Love it or hate it, the iMovie HD interface was always the same. The preview window was always large, often larger than necessary. The clips pane was always three clips wide, which meant for a lot of scrolling if you had too many clips. If you had a large project in your timeline, the only way to see it all was to shrink it to the point it was useless to try to make accurate edits to it.

The funny thing is, I thought I loved it. I always knew where I was and what I was doing. The reality is, I just didn't know things could be different, or, for that matter, better. When I first got into the iMovie '08 interface I felt like someone moved all the rooms around in my house. Just like how I can stumble into the bathroom in the middle of the night, I could move around in iMovie HD without putting much thought into it. In iMovie '08, I was stumbling into walls.


Then I started playing around, and that's when it hit me: I can put stuff just about wherever I want it. It's like moving the door to the bathroom right next to my bed (or even better, next to my three-year-old's bed) then putting it back when I am done. Talk about power. Here is how you customize your interface.

There are going to be a lot of full-size window captures for this one, so when you see an iMovie window, click on it to get the full view.

The default
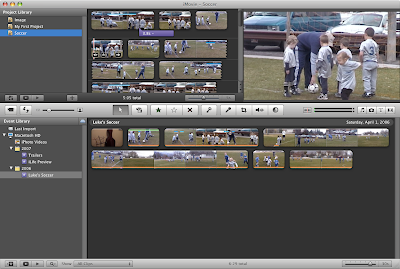
This window is what most of you are now seeing in iMovie '09:

This really isn't a bad way to start. What you should notice if you are coming from iMovie HD is that your preview window is really small, much smaller than you are accustomed to. But think about it, did you really need to see your footage that closely? Probably not, especially because there was always the full screen preview. (It was like ordering food in America. "Did you want that extra large or super extra large?") When scrubbing through your rough footage, smaller is better because...

Now you can see more of your footage at once. Notice how the Event Browser takes up a full two thirds of the window. All the more room to see where you have been and where you am going. This isn't a big deal if you have twenty minutes of footage, but what if you have 300 minutes? It makes a lot more sense to have your rough footage get the lion's share of window real estate, for now at least. Sure the project window is small as a result, but it's big enough for me to drop footage into. At the start of making my movie, that is all I need it to do.

Trading Places
So what happens when my project is getting too big for comfort? Editing a large movie in something the size of a playing card only invites frustration. There are two ways to deal with this.

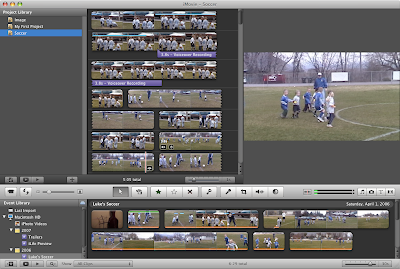
If I am the kind of person that always wanted timelines to run vertically--so I can feel like I am skydiving--I can just drag on any part of the middle toolbar not occupied by a button or slider and drag that bar downward. (I could also drag it upward if I wanted more room for my source footage.) Dragging the toolbar gives me this:

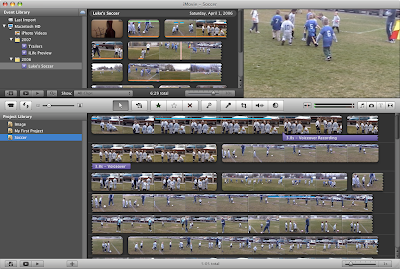
Probably not the improvement you were hoping for. Method number two of granting more real estate to your project will get the job done much better. On the middle toolbar, you will see a button with facing, curved arrows. Go ahead and give it a click.

Voila. Now all that space that was dedicated to your Event Browser appears to be not so dedicated. This is the kind of room you can really use to dig into your project with transitions, additional edits, and audio tracks.

This space becomes even more useful if you use the "Trim..." feature to re-edit clips within your project. All of this and a cool animation to boot. (Can't get enough of watching your project flushed to the bottom of the window? Hold down the Shift key while you click the button. Slo-mo!)

Now you see it...
There is even more room to capture, for either my project or my source footage. What's up with those lists, either my project list or my events list? If everything I want is in a single event, and the only place it's going is into a single project, then why keep those lists in view? Click the little star-page button below either your events list or your project list.

Ahhhhhhh. Now we can really stretch out.

Of course, the same buttons will bring your lists back.

When things are big that should be small*
So what if something is big and you want it smaller? What if something is small, and you want it bigger? Let's make it happen.

The preview window, or "viewer", can be resized two ways. You probably noticed that dragging the middle bar will resize it up or down. You can also select "Viewer" in the Window menu and choose between small, medium, and large. (You can also use the Command key with "5", "6", or "7" to the same effect.)

If your clip thumbnails are too small or too big, the slider in the middle toolbar will resize them to your liking.

You can have big thumbnails,

Or itty-bitty ones.

Tiny ones obviously help you see your whole project better. Big ones will help you find the particular point in your footage more easily. The size to which you set your clips will be reflected in the print-out if you decide to print them. ("Print?" Yes, you can print.)

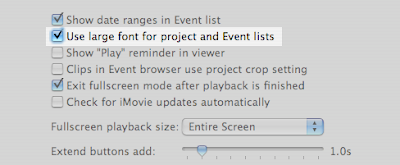
Finally, if the fonts in your project or events lists are too small, you can make them bigger in the iMovie preferences.

(* You earned bonus points if you knew that this section's title comes from a Jamiroquai song.)

Set it, but don't forget it.

You may be a creature of habit, but don't be needlessly stuck in just one way to view your movies. iMovie '08 wants you to shift it, swap it, and twist it around to suit the task at hand. Put this flexibility to good use by being flexible yourself. In then end, it will probably save you time and sore eyes.

Read More...

How to Use Project Folders

|

Having all of your projects at your fingertips is a great feature in iMovie. But what do you do when your projects start to pile up?

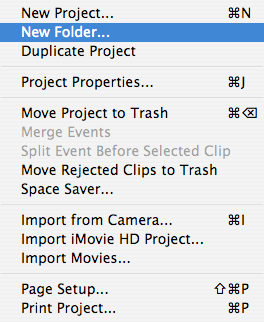
Apple was a step ahead on this one. iMovie '09 provides folders to organize your projects. These are just like the album folders in iPhoto or the playlist folders in iTunes. You can find them up in the File menu.


You can rename a folder by double-clicking on it.

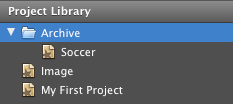
The feature has several uses. It is a nice way to organize a group of projects I plan to add to a single DVD. As an added bonus, the Media Browser in other iApps will show the same folder structure that you set up in iMovie. I also use this feature to archive old projects. Hats off to Apple. This is a nice touch.

Read More...

Quick Tip: Print Your Project

|


"Print?" you say? "Why in the world would I need to print?" Well, I can think of a number of reasons. Thanks for asking!

For example, let's say you are working in a long project that doesn't all fit into your window. Alternatively, let's say you want to share a visual representation of your movie project, identifying particular transitions, clips, or titles for someone who isn't there in front of your screen with you. Finally, imagine having a plethora of events in your library and you are sorting through them to decide which to trim or delete. In all of these cases, you can print your events or projects to have as a handy reference.

Just a few observations about printing behavior.

1. The print command will print whatever project or event(s) you have selected. (Select your events in the left-hand navigator to make sure you are getting the right ones. You can select multiple events.)
2. The print command respects the level of zoom you are using to view your clips. (The 1/2 second zoom means a lot of frames on your printed page while the 30 second zoom means a lot fewer frames on your page.)
3. (Updated. See Below) Whatever you select to print will be fit to one page, unless you really do have a lot. If you have too much for one page, it will spill to another page but all of your clips will appear very small.
4. If you are printing events, the printed page will have a divider identifying the each event.

I would advise using the print preview button as you are playing around with this. It will give you an accurate view of your output before you commit it to ink and paper. Have fun printing your movies!

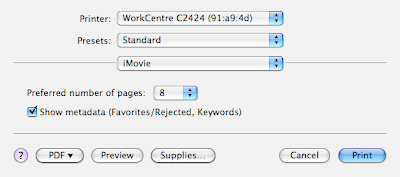
Update: I always forget to check the application-specific print settings that many apps place in the print dialog. Someone pointed out that iMovie allows you to choose up to 8 pages for your output and also let's you turn on and off the metadata like favorite markups. Very cool.

Read More...

How to Delete a Clip

|

I have seen some comment that the new iMovie is space-efficient. The idea is that your drive only needs to contain one copy of some footage, and all projects built on that footage will not needlessly multiply it like iMovie HD does. Others have commented that iMovie '09 will take a lot of hard drive space because it acts like an iPhoto for your footage, storing and cataloging it all so you don't have to leave it on external devices like DV tapes. Footage, just like photos, adds up quickly, just as quickly filling up your hard drive.

So which is it? Are we getting a fit Jack Sprat or his more corpulent wife? The truth is that it is up to you. There is certainly no requirement to leave footage in the Event Browser. It is your job, however, to get rid of it. So if you select footage in your Event Browser and hit delete, is it deleted? Almost, but not yet. Here is how to delete a clip.

Deleting a clip in a project
I am just getting this out of the way before we move on to real, space-saving deletion. As mentioned before, iMovie edits by referencing source video, not copying it. This means if you delete a clip in your movie project, you have only deleted a reference to the clip. The clip is still on your hard drive, taking up space. You need to delete the clip in the Event Browser to finally be rid of it.

Deleting a clip in the Event Browser
The Delete key in iMovie '09 actually works in a very similar way to the Delete key in iMovie HD. Previously, if you deleted a clip, it went to your trash. There it lived indefinitely, that is until you emptied the trash, at which point it was gone forever.

iMovie '09 doesn't move clips to the trash. It just rejects them. A "rejected" clip is actually just a clip marked up by the Reject tool. This behavior is a lot like moving clips to the trash. You can read more about the reject tool in my post about the Advanced Editing tools.

How to use the advanced editing tools

The Delete key just marks a selected clip as a reject, but doesn't actually delete it. To accomplish that, you need to take an excusive look at all your rejects. You can do this by viewing Rejected clips only in the View menu, or in the pull-down menu in the lower left corner of your window.

Once you have selected to view only rejected clips, you have the opportunity to remove them from the Event Browser and move them to the trash in the Finder. (Yes, this is now a three-step deletion process. If you accidentally delete something from this point on, you better have a dang good excuse.) The iMovie window is pretty obvious about how this is done. (Click to enlarge)

What happens behind the scenes here is pretty cool. Once you move your rejected clips to the trash, iMovie '09 will actually split the source video file in the Finder into separate clips and and toss the rejected clip file into the Finder trash. It also does this with the corresponding thumbnail footage that it generated when you imported the video. To finally be truly rid of the footage, you have to empty the trash in the Finder.

Once you delete the footage in iMovie, by which I mean the second delete when you send it to the Finder trash, the surrounding footage that survived becomes two different clips, and that forevermore. You can always reimport the footage, but you can't resurrect it from the Finder trash and rejoin it to its surrounding footage.

I'll take the lean
So whether your iMovie is a Jack Sprat or a Mrs. Sprat depends on your diligence in deleting video from the Event Browser. I personally find that I have always recorded something that I will never bother watching again, so I try to keep my iMovie on a regular diet.

Read More...

How to Save Your Movie Project

|

This is a quickie, but a goodie. I have noticed in some places a little confusion about how to save your project in iMovie '08 and '09. This is how you save your project:

1. Make all the edits you need to make.
2. There is no step 2.

From what I can tell, the genius in iMovie is that it doesn't actually make permanent changes to your source video as you cut, color, and do whatever else you do to it. (My wife often wishes salons worked this way.) In fact, it appears that a project is just a list of changes that iMovie shows you while you are editing, referencing the necessary video as it goes along. Your edits are only permanent in the videos you export from iMovie, such as to YouTube or to the Media Browser. (Hence the warning you get if you make a change after already sending it to the Media Browser.) Even then, when iMovie exports it just renders a new video file that follows the instructions laid out by your project. Because all of your edits are nondestructive, the Apple engineers decided to do away with the mundanity of saving projects. I am also confident that this explains why older machines can't run iMovie '09. All this dynamism take a lot of horsepower!

The only caveat to this behavior is that your list of Undo's will be lost if you quit iMovie. Still, that is just a matter of convenience because you can always manually go back to what you had before. All in all, I really the editing method of iMovie '09.

Read More...

How to Make Frame Precise Edits

|

Editor's Note: This post needs updating.

For those of us who used to drag the timeline zoom slider so far in iMovieHD that you could see electrons orbit in your video clips, cutting video in iMovie '09 feels something like making an incision with a cannon ball. Making precision edits in iMovie '09 requires a little understanding of video formats and a much better understanding of the new UI. Want to trade in your cannon ball for a scalpel? Here's how.

A little info about video
Most of the video you will work with in iMovie '09 is probably in a format called NTSC and contains the equivalent of 29.97 frames per second. If it doesn't have 29.97 frames per second, then it probably will have less. PAL, for europeans, has 25 frames per second. Videos from your still camera might have as few as 15 frames per second. The reason I bring up framerates is that, as I understand it, the vast, vast majority of editing situations are satisfied as long as you can select each individual frame. There is nothing in between frames to edit, really, so cutting video with precision is a matter of cutting it at the right frame.

Enter the slider
The Project Slider

The Event Browser Slider

And this brings us to the new iMovie zoom slider. The slider actually shows up in two places: first, in your project window; and second, in your event browser. This is an improvement over iMovieHD because the only way to zoom in on video there was to add it to your timeline first. The Event Browser slider allows you to zoom and precisely edit a clip before you drag it to your project.

This new slider feels very different because the old zoom slider moved fluidly. That is, you could zoom in exactly as far as you wanted to. (At least enough to see only about 1.5 seconds of video in the timeline, depending on the size of your iMovie window.) The new slider has preset stops: 1/2 second, 1 sec, 2 secs, 5 secs, 10 secs, 30 secs, and "All". These stops refer to the amount of video that will be represented by a thumbnail. (And this is why iMovie '09 makes thumbnails of all of your video. It basically creates a really small version of a clip and uses that to represent your clip in the application window.) You'll notice that as you drag the slider around, you get more or fewer thumbnails. This is because you are telling iMovie how much video you want inside each thumbnail.

You can see this in action in the following shots:

1/2 Second

5 Seconds

All

Notice how the Five Seconds shot and the All shot have the same number of thumbnails. This is because none of my clips are longer than five seconds. So no matter the zoom setting, individual clips will not be put together by the zoom slider. (Why the thumbnails look different between the two is beyond me.)

Yeah, yeah. How do I edit?
Taking what we know about the slider and what we know about framerates, all this means is that the most precise editing can be done when you select the 1/2 Second view on the slider. If your footage has thirty frames per second, you can put your understanding to the test. Set the zoom slider to 1/2 Second. Then, without clicking, slowly drag your mouse across a clip. (This is called scrubbing.) You will notice that the playhead (the red line) will jump as you slowly scrub. Each jump represents a frame. Within one thumbnail at the 1/2 second setting, you should be able to count about 15 jumps. If you set the slider to 1 second, you would be able to count about 30 jumps, or 25 in PAL videos.

The way you select video by dragging will work the same way. You can see this by clicking on a point in a clip and holding down your mouse button as you drag.

Dragging to select: Point A

Dragging to select: Point B

Point A and Point B are separated by a "jump" in the movement of the mouse, or one frame. If you zoom in to 1/2 second per thumbnail and you pay close attention as you drag, your edits can be just as precise as was possible in any previous version of iMovie.

Remember me? I'm the one who asked how I actually edit.
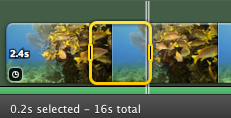
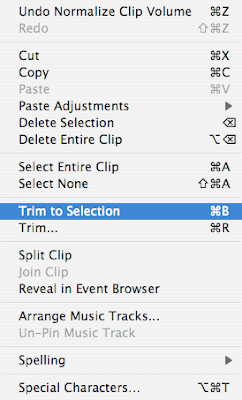
Once you have selected a range of video, what you do next depends on where you are. If you are adding video from the Event Browser to your project, just drag the selected clip and drop it in. If you are editing within your project, you can trim a clip down to the part you selected. Press Command-B or select "Trim to Selection" from the Edit menu.

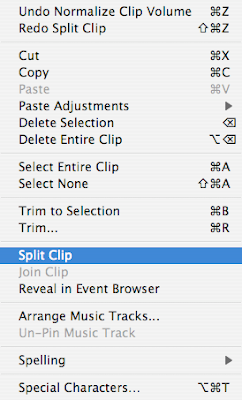
You can split a clip, by selecting "Split Clip" from the Edit menu.

Spliting a slip will actually split a clip into three clips. One that comes before the range you selected, one made up of what you selected, and one coming after the range you selected. NOTE: You can no longer split a clip at the playhead, like in older versions of iMovie.

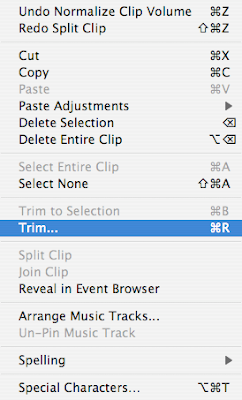
Another very interesting feature is the "Trim..." option in the edit menu. (This is replaced by the "Trim Music..." option that appears if you have a music track selected.) This will show the original video source in the project window and allow you to basically reselect the range you imported from the source clip. I consider this a very handy feature. You can bring it up by pressing Command-R or by selecting "Trim Clip..." in the Edit menu.

What about editing where an audio track comes in?
Editing audio is a whole other bag of chips. In some cases, editing audio works very similarly. What I call "sound bytes," which show up in your project as little green or purple flags sticking out under the video clips, exhibit the same frame-by-frame jumping as you drag your mouse to move or trim them. Not so if you are editing sound in the Trim Music window. In that window as you drag your mouse it is no longer jumping like before. This is because music is not broken into frames like video. Paying close attention to the preview window, you will see that the video is still jumping frame by frame, even though your mouse isn't. Back in the normal project view, if you are dragging a background music track to pin it to a particular point in the video, the dragging (for a reason I cannot discern) becomes much less precise, jumping many frames at a time. This one especially bothers me because sometimes you want a downbeat in the music to coincide with a specific frame in video. Hopefully, as you drag the music track you will be lucky enough to land on the correct frame. Perhaps someone can add a little insight in the comments below. Also, there will be more audio editing posts on the way.

I hope this has been useful. Although video selection and editing is pretty different than in older versions of iMovie, it is no less precise. So grab that scalpel and get cutting!

Read More...

How to Select an Entire Clip with One Click

|

"Gah!", I said. "Why can't I select an entire clip by clicking on it?"

"Double-click? No."

"Double-click really fast? No."

"GAH!"

Well, I was right. I couldn't select an entire clip with one click...yet.
Luckily, the iLife UI engineers weren't out to lunch on this one. If you go to the iMovie preferences, you will find a setting to make the necessary change.

The default for this setting is to select four seconds of video with each click. Notice that the timing for that setting is adjustable. You can also set it so that your clicks will deselect everything. (You would use this if you only want to select clips by dragging.) I like selecting an entire clip with one click because it seems the most intuitive to me. Glad to have that sorted out.

Read More...